Article Summary: Guava is the best symptom tracker app for visualizing your health journey. Use it as a visual symptom journal to log pain, identify health triggers with a symptom correlation tracker, and generate printable symptom reports for doctor visits. Whether you need a Long COVID symptom diary or an endometriosis pain tracker, Guava helps you monitor health trends effectively.
Welcome to Guava, your personal symptom-tracking app and health record platform. Guava is designed to empower you with practical data and health insights. This guide will help you efficiently track symptoms, visualize trends, and share your health data, making it easier to manage your wellness journey and get the most out of your healthcare appointments.
How to Log Symptoms in Guava
Start by selecting the “Symptoms” button on your Today page. Then, you can search for which symptom(s) you want to log and add custom symptoms. There’s no limit to how many symptoms you can log at once or over time, even for non-Premium users.
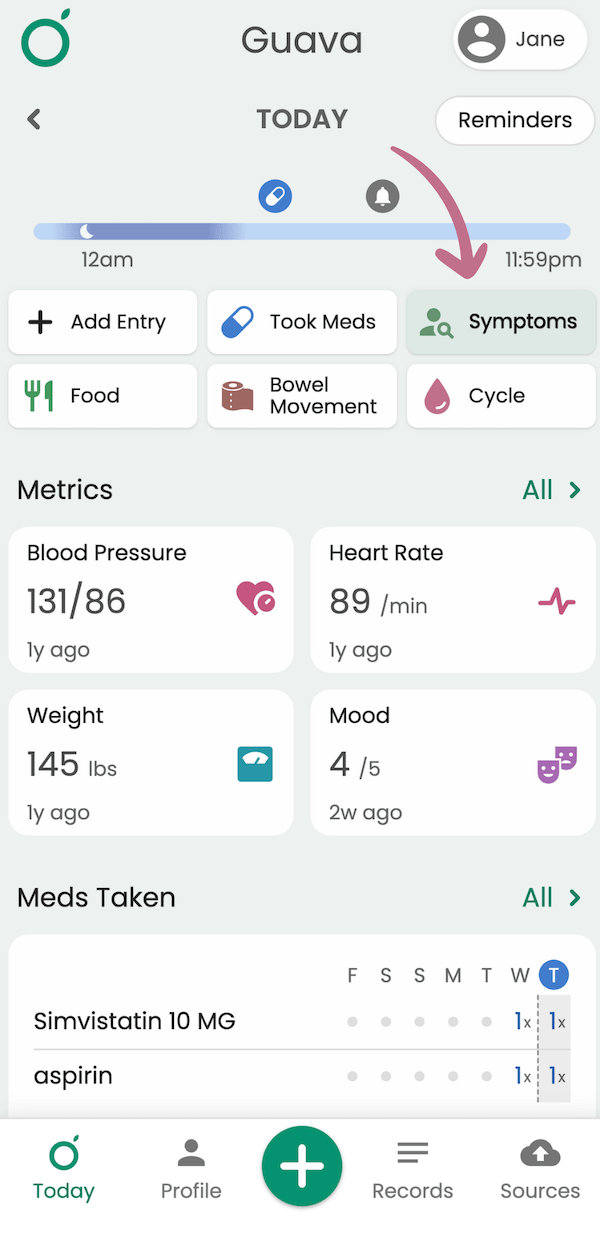
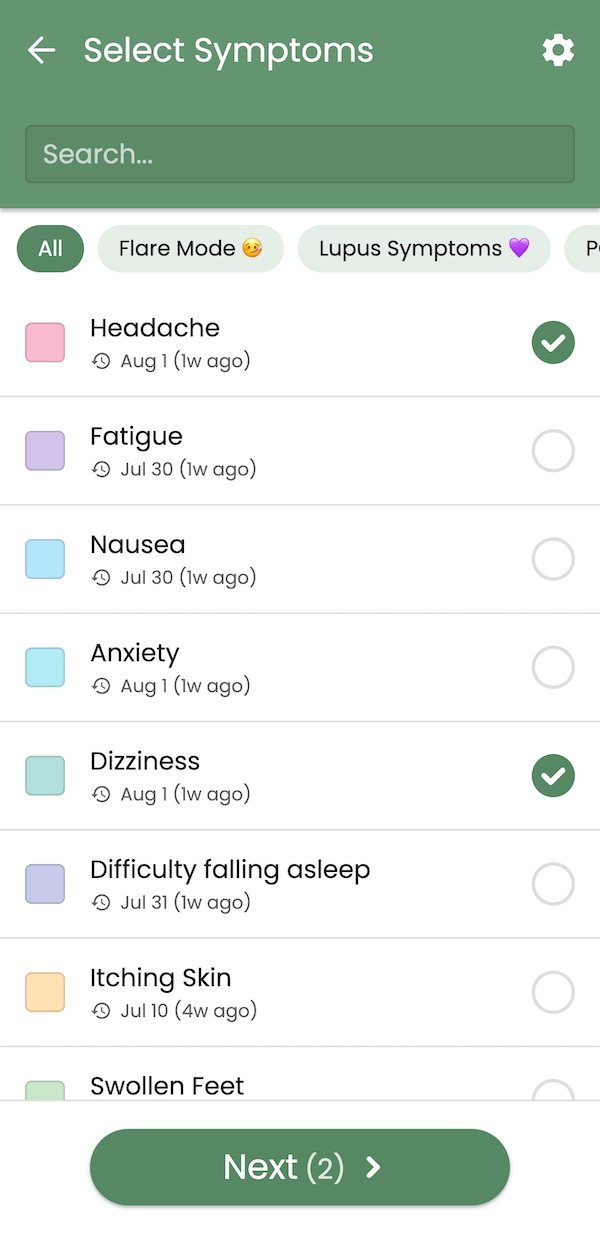
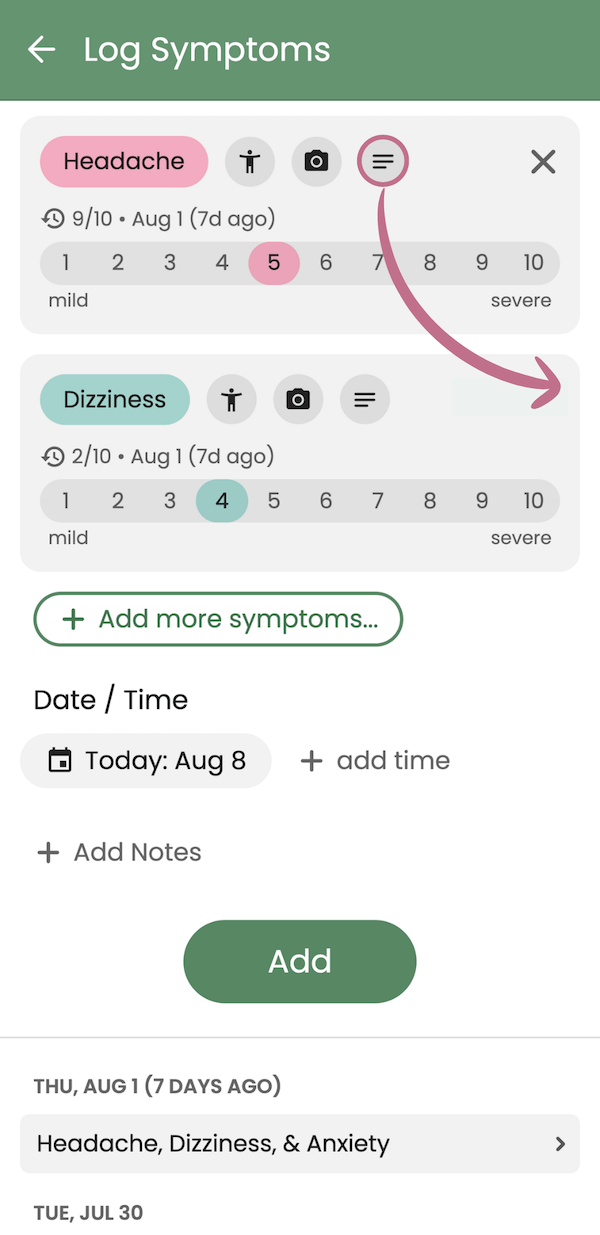
Once you’ve selected the symptoms you want to log, any additional information you record is optional. Some useful tools you’ll find in symptom logging include:
- Symptom severity scale
- Descriptive adjective tags
- An extra notes section
- Photo uploading
- Body Map to record location
We recommend logging anything that’d be helpful for a provider to see or anything you’d like to monitor over time.
Adding Notes and Tags to Symptoms
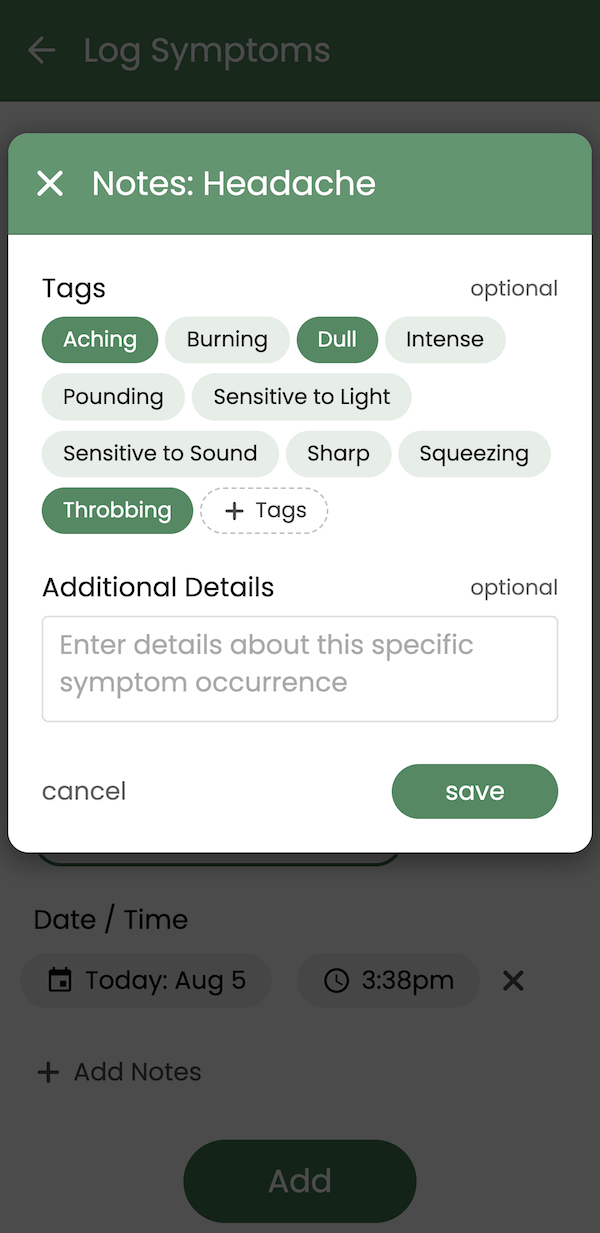
To add notes about a symptom, select the notes icon next to the symptom title. For some common symptoms, we worked with providers to compile a list of adjective tags you can choose from to describe what’s going on easily. If the symptom you’re logging doesn’t have a tag already, you can add one manually. If you’d like to jot down anything else, feel free to add it in the “Additional Details” box.
Using the Symptom Heat Map
To mark where symptoms occur on your body, you can find the Body Map by selecting the body icon next to a symptom name. Tap a spot to mark a location and tap the back arrow to undo it. You can also switch between the head and the entire Body Map in the bottom right corner.
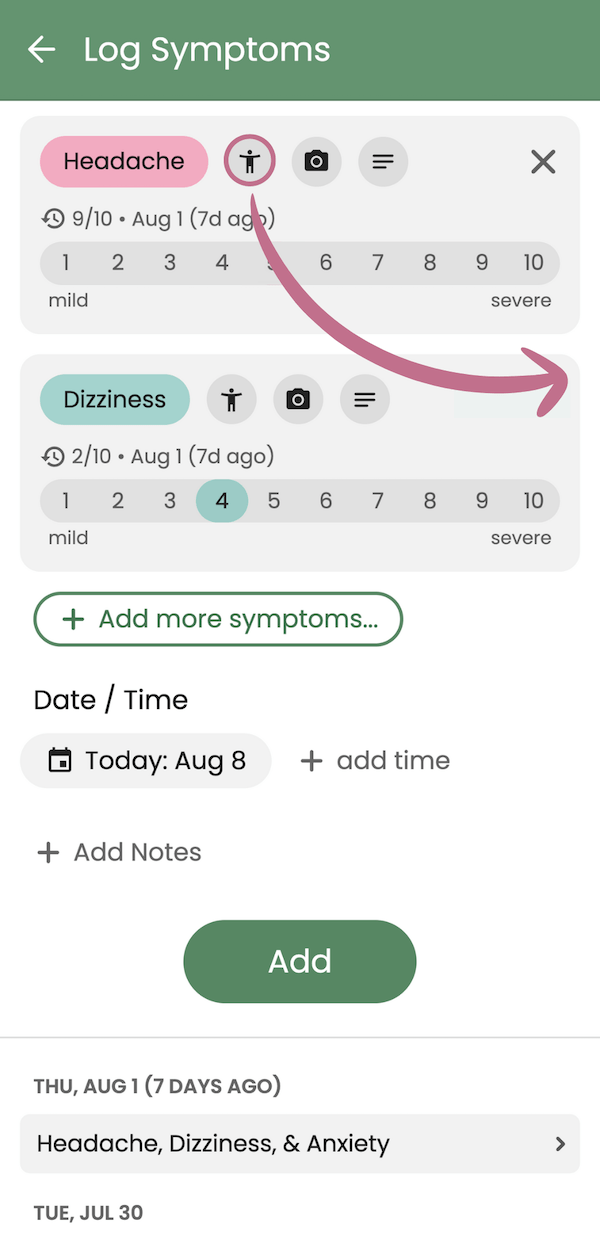
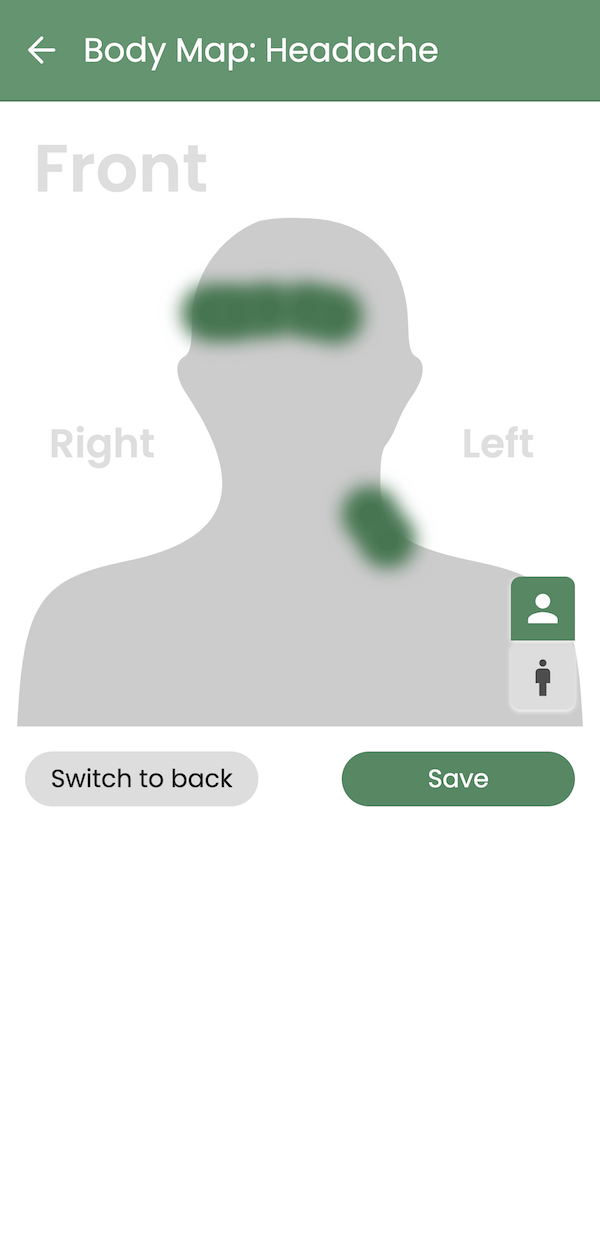
To view your Body Map over time, head to the Today page and scroll down to the Symptoms section. Select the symptom you’ve been recording Body Map entries for and choose the “Body Map” button.
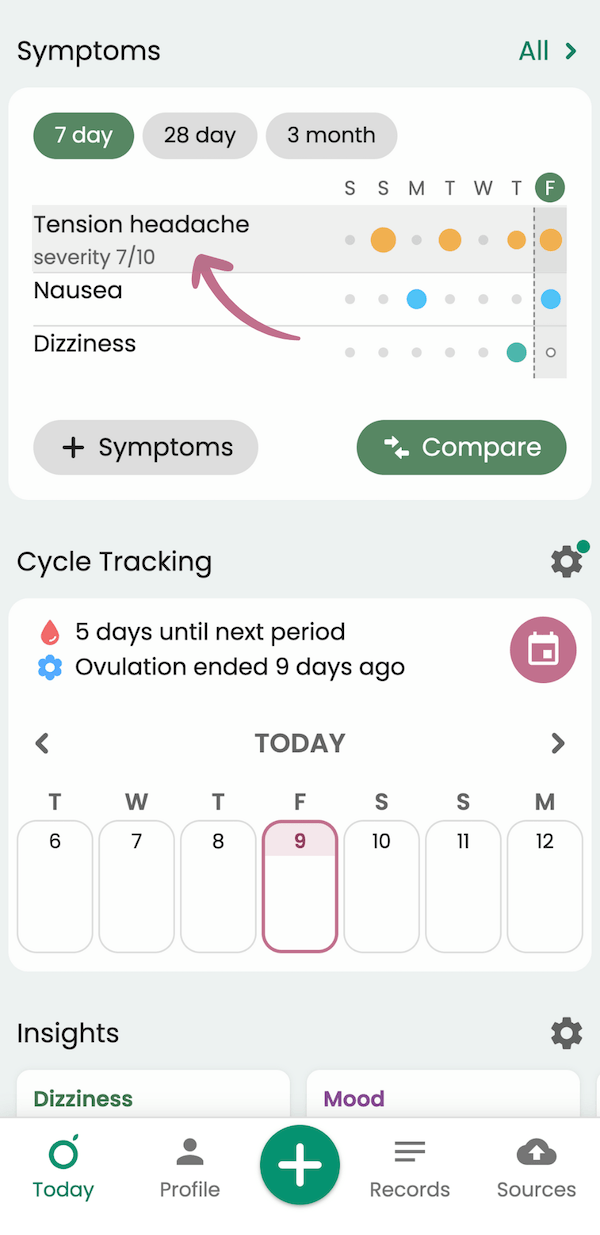
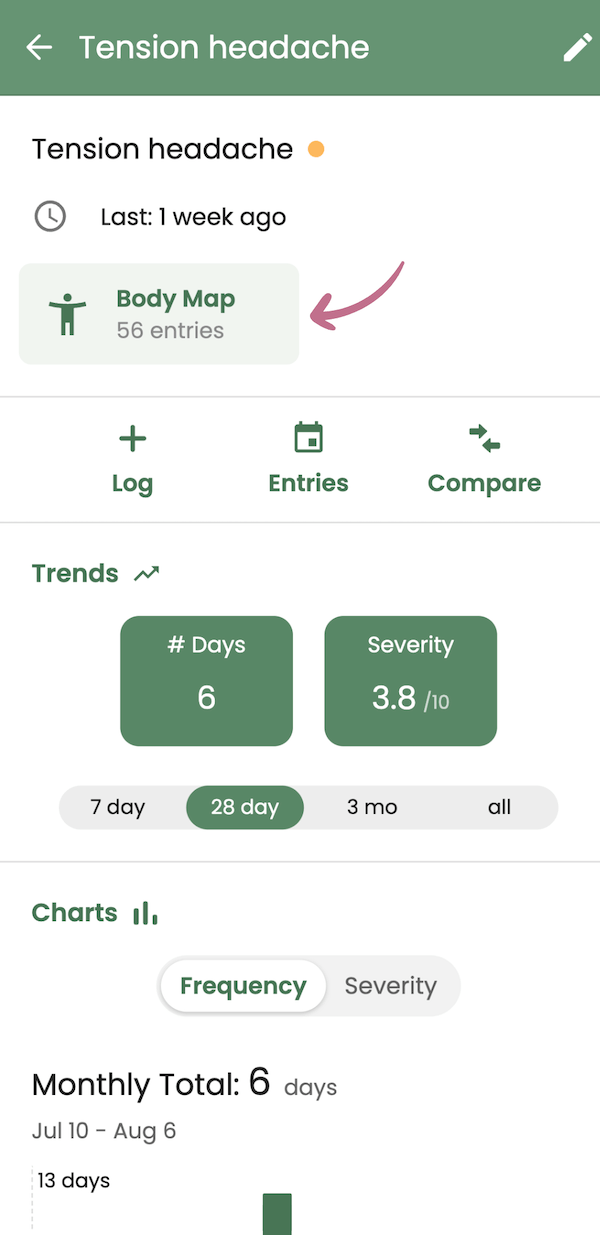
From here, you can visualize how your symptoms change or migrate over time.
Attaching Photos
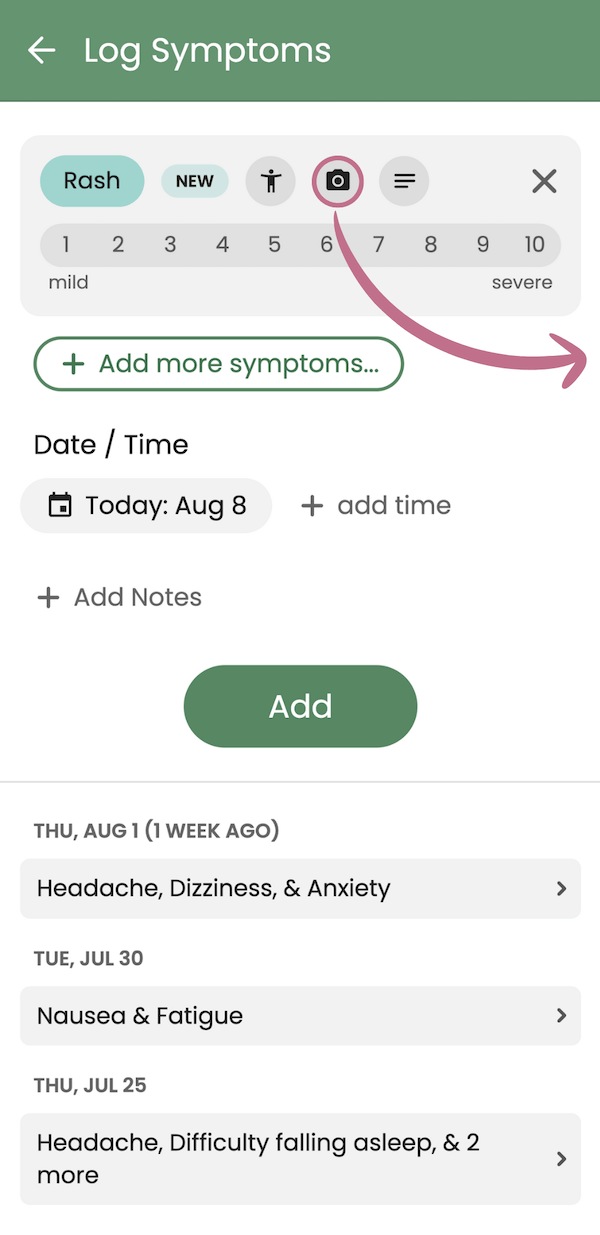
To attach a photo to a symptom, select the camera button next to the symptom name. Next, you can either take a picture on the spot or upload one from your camera roll or files.
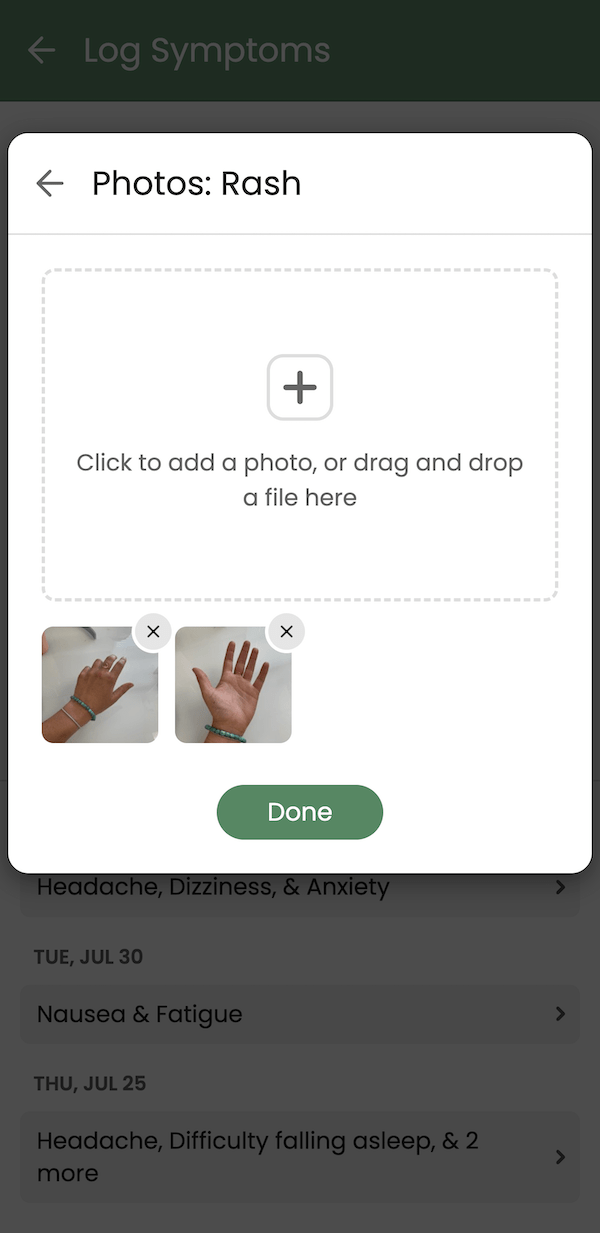
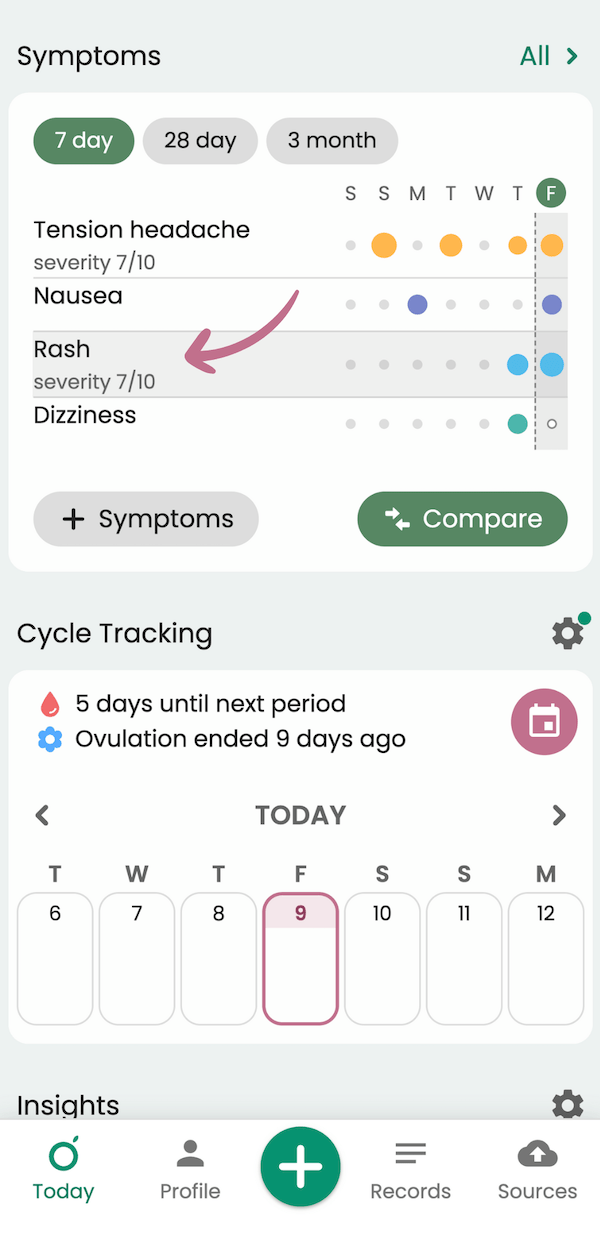
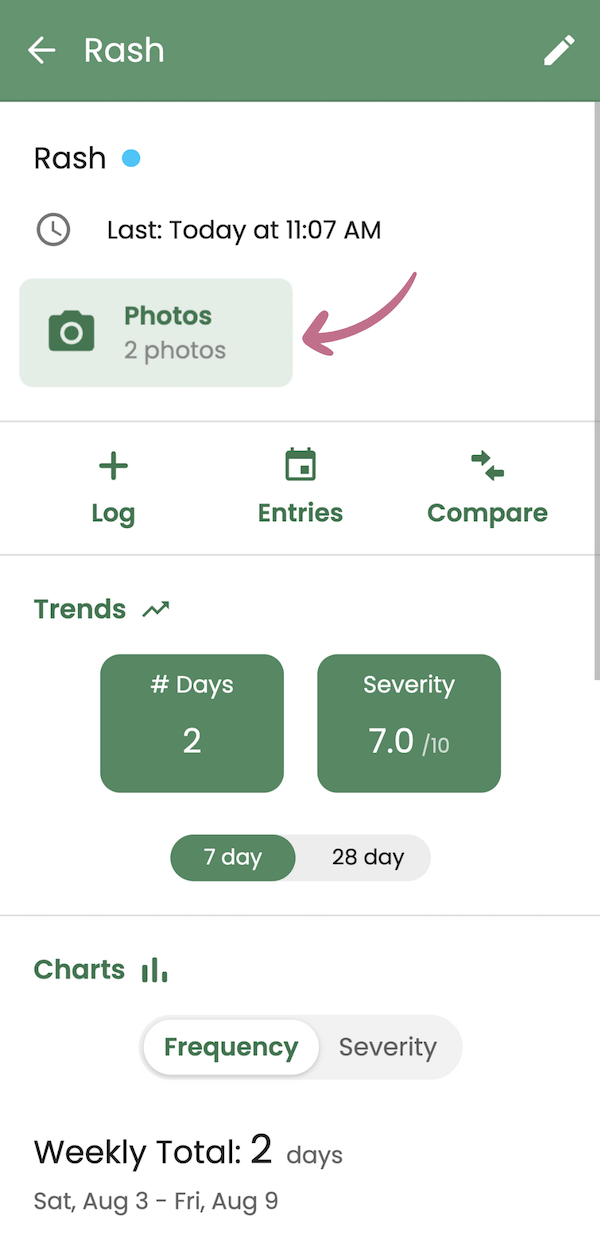
You can access symptom photos in Guava by selecting the symptom from the Symptom section of your Today page and going to “Photos.”
Symptom Groups
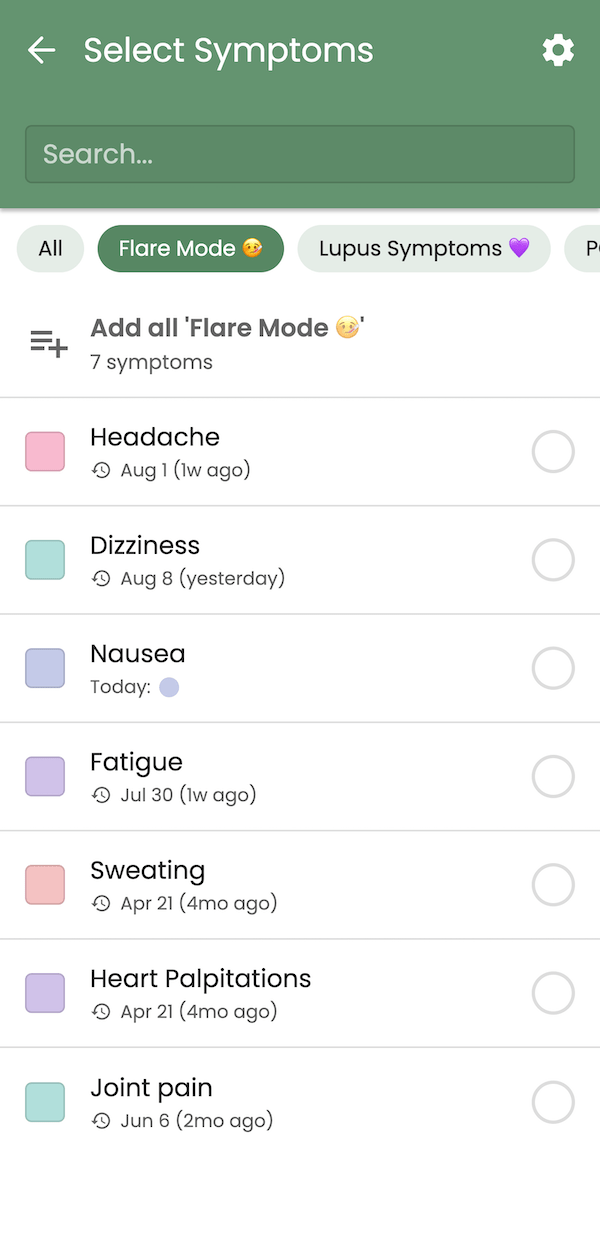
Many users find it helpful to make symptom groups to log more easily. If you’re having a flare-up, for example, you can create a custom group with all of your recurring symptoms in one place. To Create a New Symptom Group, select the gear icon in the upper right-hand corner.
How to Visualize Your Data
To see details, trends, and insights for your symptoms, start by scrolling down to the Symptoms section on your Today tab.
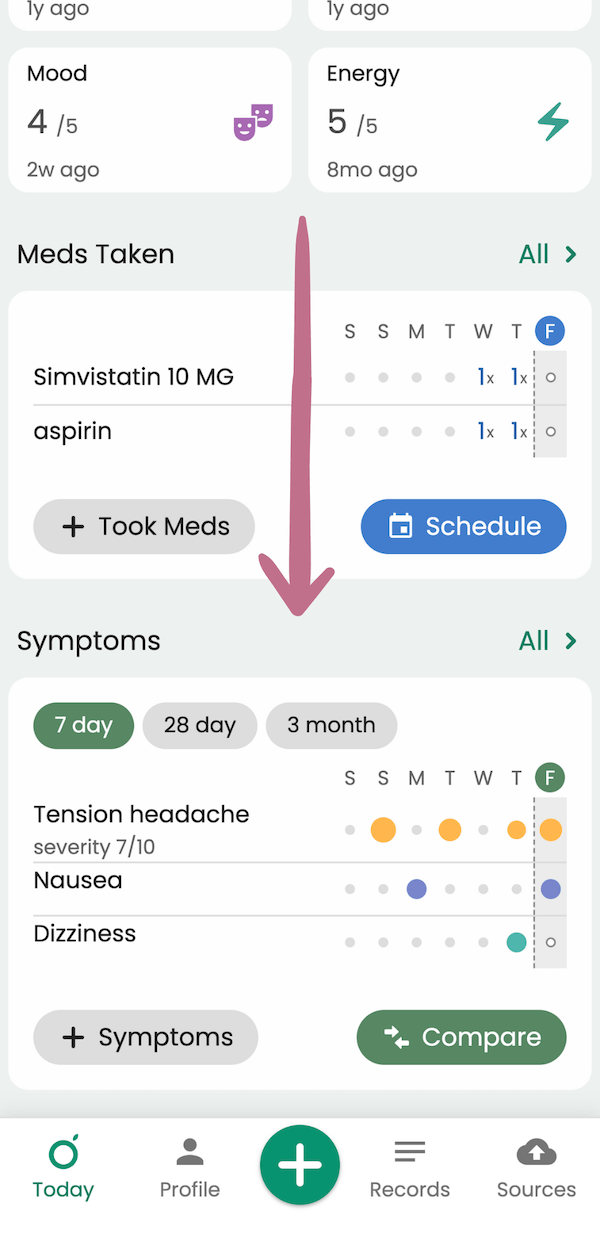
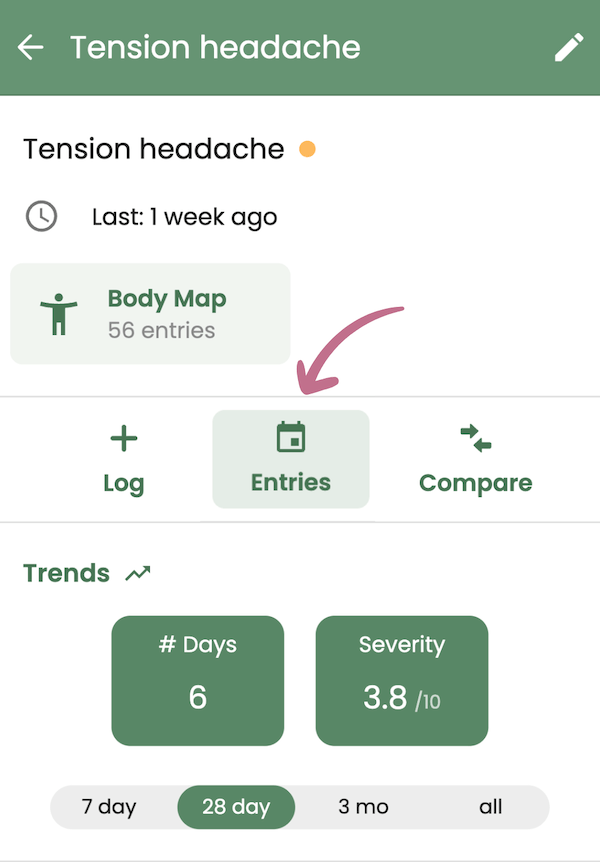
Tap on the symptom or "All" and search for the one you're looking for. Then you can log the symptom again, view that symptom’s entries on a calendar, or compare it with others. This is also where you can see trends for both frequency and severity of your symptoms.


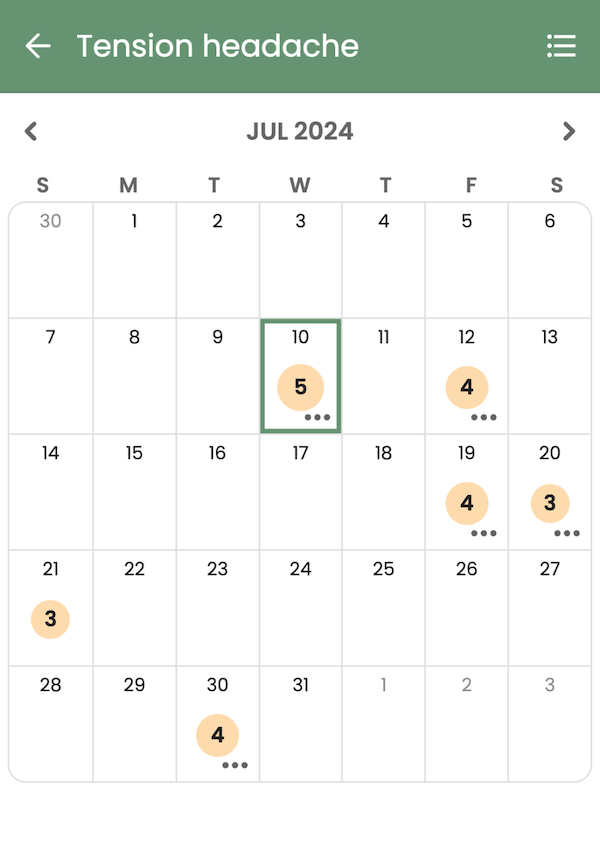
Viewing Your Symptom Calendar
To view a calendar of the entries you’ve logged for a symptom, select the calendar icon that says “Entries.”
Comparing Your Symptoms
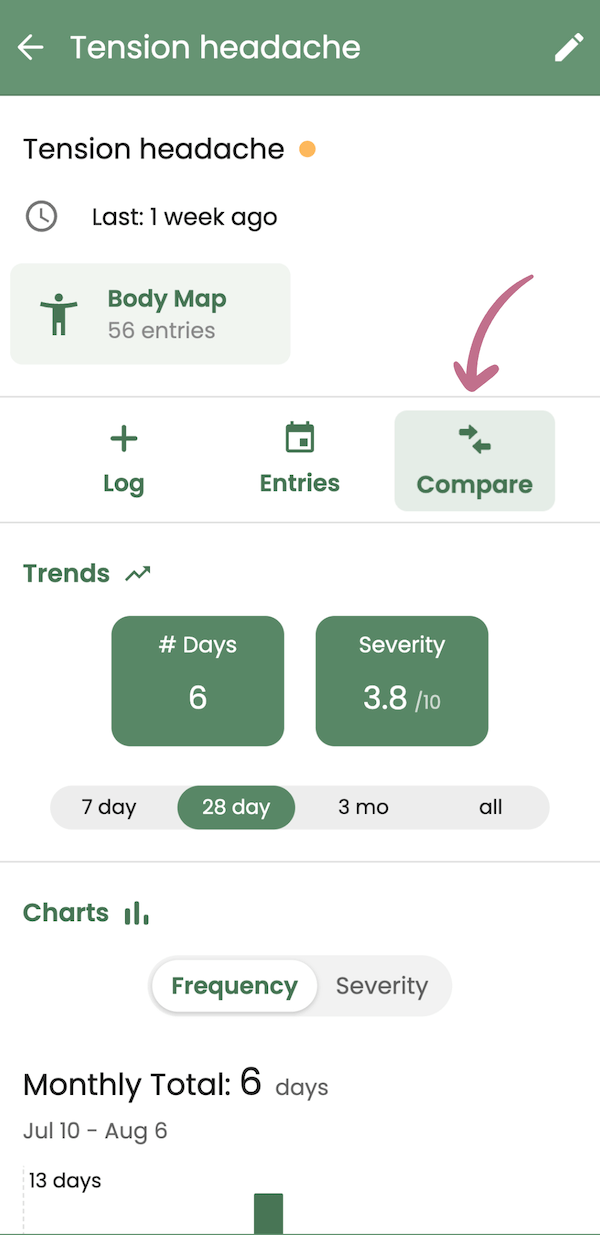
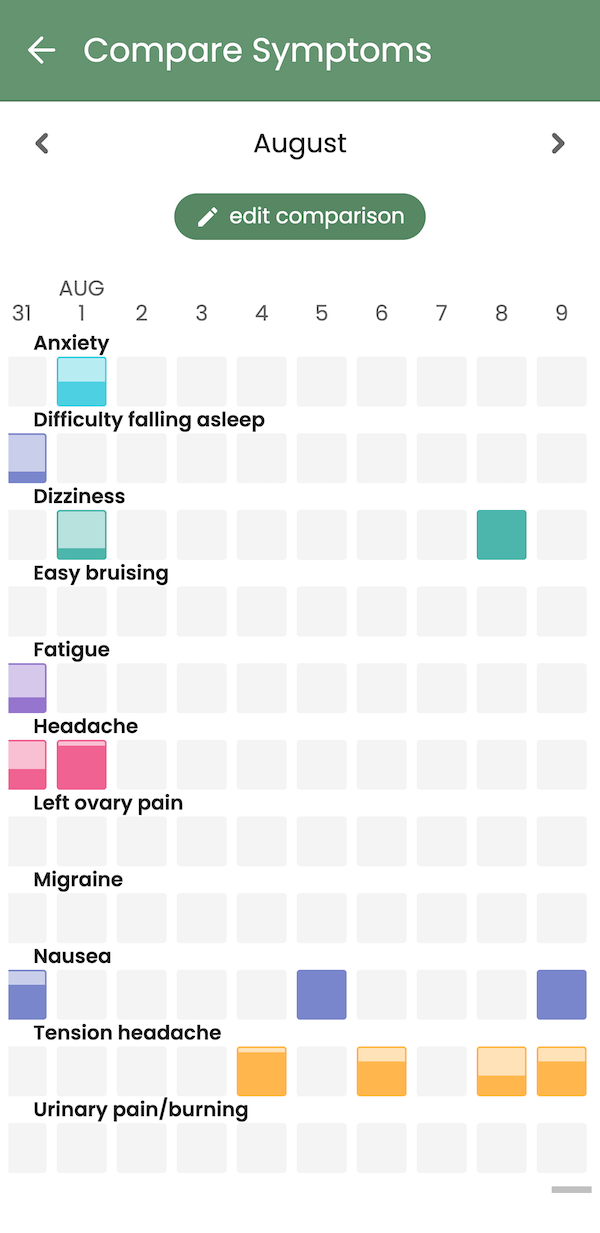
To compare the symptom you’re looking at with others, choose the “Compare” button from the Symptom Details screen or directly from the Symptom section of the Today page.
Viewing Trends and Charts
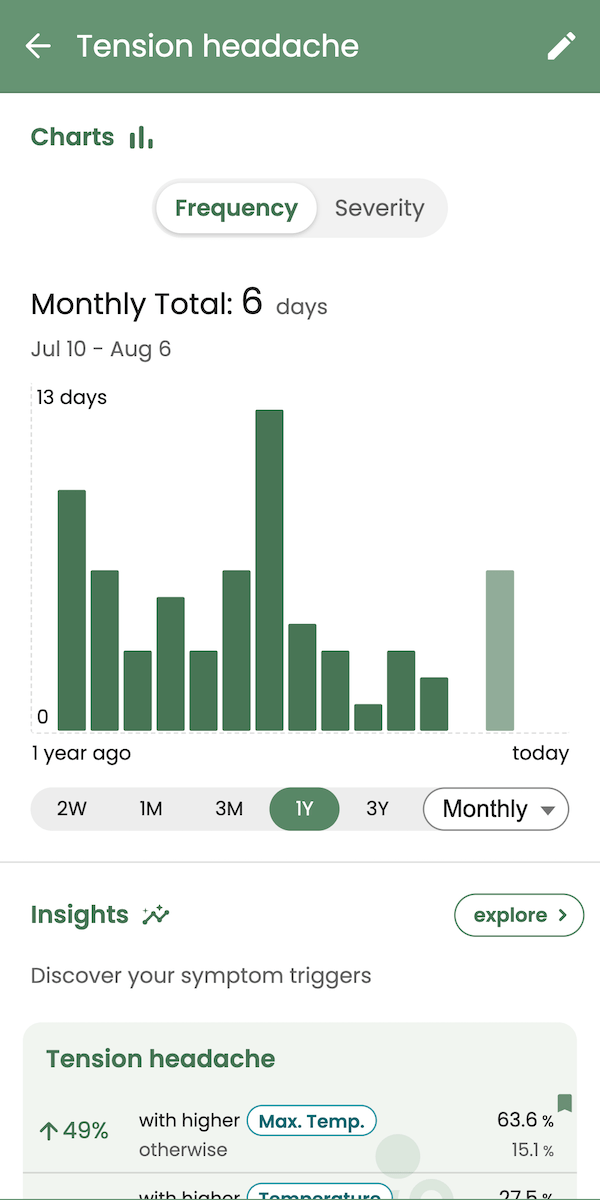
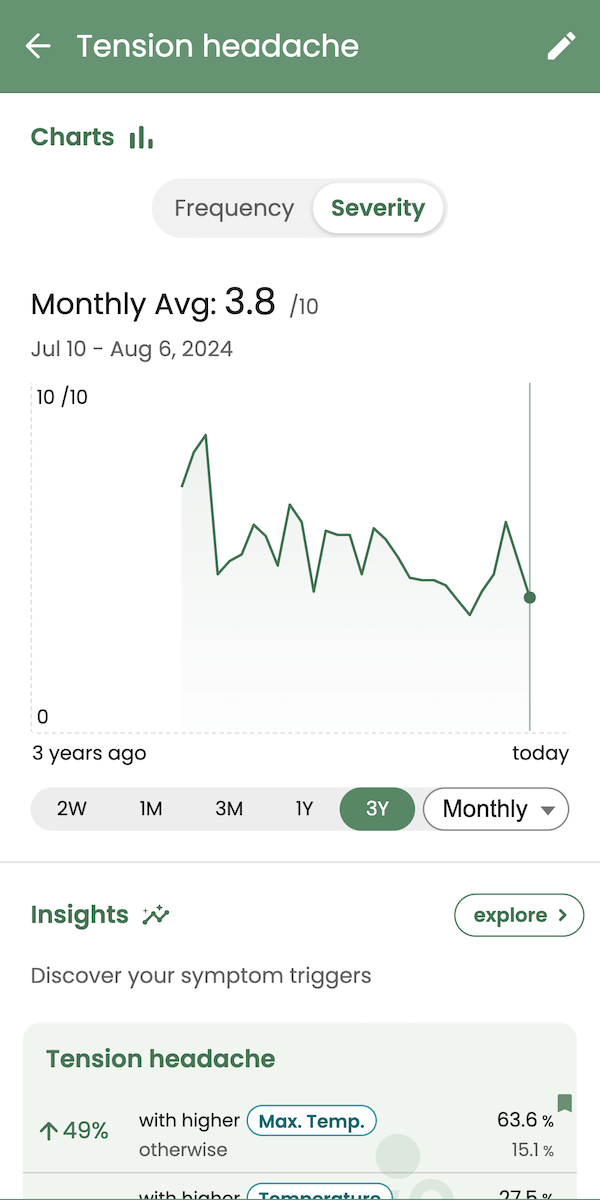
Scroll down in the Symptom Detail view. Here, you'll see your trends and charts that let you toggle between frequency, severity, and different time periods.
Viewing Insights and Co-occurrences
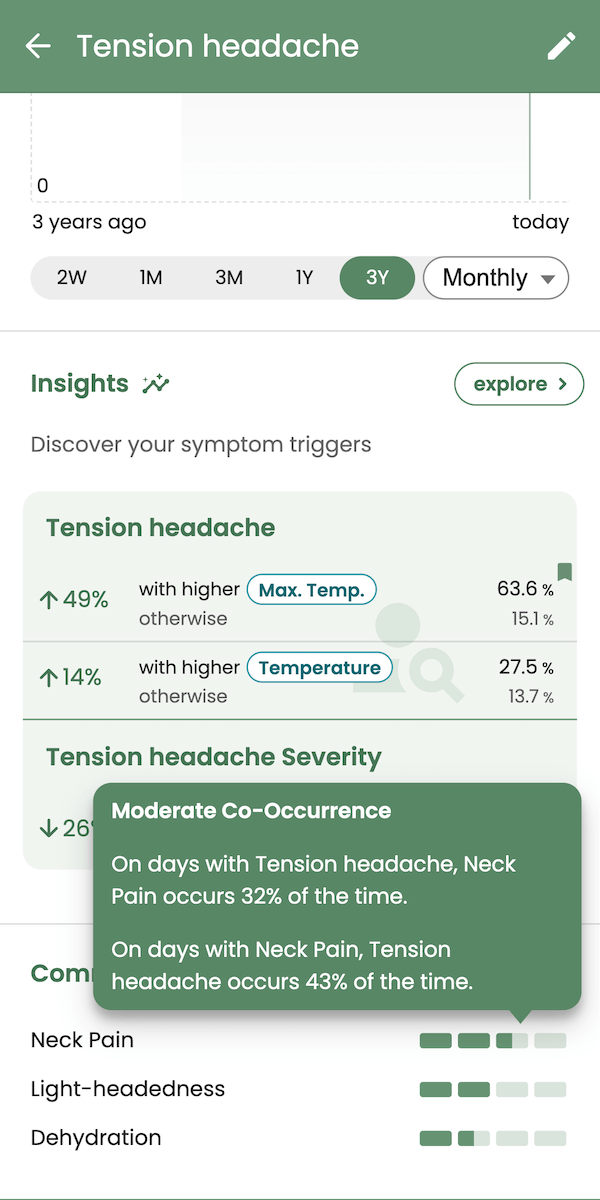
If you’ve been logging other factors besides symptoms, like energy levels, nutrition, or medication, Insights will show up here. Below Insights, you’ll also see if any other symptoms tend to co-occur with the one you're interested in.
Guava integrates with external platforms, like Apple Health, Google Fit, FitBit, Garmin, Oura, Samsung Health, and more to show you detailed health insights. Insights allow you to see how your symptoms relate to custom health metrics like activity, heart rate, sleep, etc. These can help you find symptom triggers and predict flare-ups.
How to Share Your Data
Downloading Your Symptom Report
When preparing for a doctor’s visit, having your logged data in hand can be a powerful tool for getting the most out of your appointment. To download a Symptom Report as a PDF, select “All” in the Symptom section on the Today page, then tap the list icon in the top right corner.


Then, select the download icon, choose your desired date range, and decide whether to include photos and Body Map data.


Using Visit Prep
Similarly, you can streamline your appointment by utilizing the Visit Prep feature. This tool consolidates your health information into an easy-to-read PDF tailored to your visit goals. To create a summary, navigate to the Records tab, select “Prepare for Visit,” and pick the appropriate visit type.
Guava is a free tool designed to simplify health management. With Guava, you can track symptoms, discover insights, and consolidate all your patient records in one place.


